Leaves are falling and the air has grown crisp. It’s fall, and that means spooky season has come again! Time to bust out the skeleton decor and the candy corn. If you’re looking for more ways to get into the spirit of the season, check out the five fun, kid-friendly crafts below.
1. Tissue Ghosts
What You Will Need:
- Tissues
- String, yarn, or twine
- Black sharpie
Make It Happen:
1. Take one tissue and roll into a tight ball.
2. Place balled-up tissue in center of a second tissue, then scoop all sides of tissue around ball, leaving edges loose.
3. Tie string, yarn, or twine around balled-up tissue to create a ghost shape. You can trim string short, or leave long to hang.
4. Draw face on ghost.
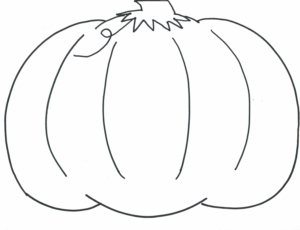
2. Sponge Paint a Pumpkin
What You Will Need:
- Pumpkin printable
- Orange and green tempera paint
- 2 paper plates
- A cheap sponge cut into squares
Make It Happen:
1. Print pumpkin on paper or cardstock.
2. Add a small amount of orange paint to one paper plate, and a small amount of green to the second.
3. Dip sponges in paint and press onto paper.
Other Thoughts:
You can cut sponges into different shapes for added fun.
3. Witch’s Hat
What You Will Need:
- Witch’s hat printable
- Crayons, markers, or colored pencils
- Scissors
- Scotch tape
Make It Happen:
1. Print witch’s hat on paper or cardstock.
2. Color as desired.
3. Cut along dotted lines.
4. Roll top of hat (part B) to form a cone and secure with tape.
5. Attach cone to base (part A) with tape.
Other Thoughts:
Make your hat wearable by hand drawing larger scale versions of the same shapes on black poster board.
4. Construction Paper Jack-o-Lanterns
What You Will Need:
- Green, orange, and black construction paper
- Scissors
- Glue stick
Make It Happen:
1. Use scissors to cut a pumpkin shape out of orange paper, a stem out of green, and eyes, nose, and mouth from black.
2. Apply glue to stem and affix to pumpkin.
3. Glue on eyes, nose, and mouth to complete your creation.
Other Thoughts:
Adjust project depending upon children’s ability level. Even a very small child can glue on eyes, nose, and mouth with a little help from a big person, and older kids can cut out their own shapes for pumpkin, stem, and face.
5. Papier Mache Bones
What You Will Need:
- Newspaper
- Scissors
- Homemade glue (See recipe below)
- White acrylic paint
Make it Happen:
1. Rough cut newspaper into squares. Around 4″ x 4″ work well for this project, but adjust size as you see fit.
2. Prepare your glue:
Ingredients:
- 1 cup of white flour
- 1 ½ cup of room temperature water
- ½ tablespoon salt
Mix the flour, water, and salt in a small saucepan. Whisk until lump-free. Bring mixture to just boiling over medium heat, stirring constantly. Be sure to watch carefully as it begins to thicken, and keep stirring to make sure that the glue doesn’t burn. As soon as mixture starts to bubble, immediately remove the pan from the heat and allow the paste to cool, stirring frequently to speed the cooling process and ensure smoothness of glue.
CAUTION: Glue will be extremely hot. Allow to cool completely before proceeding to the next step.Dip a piece of paper into the glue, whipping along edge of bowl to remove excess. There should be enough glue on the newspaper for the entire paper to be completely saturated, but not so much that its dripping off all over the place.
3. Tightly roll a sheet of newspaper into a log shape to create a base for your bone. Use glue to seal log shut.
4. Dip a piece of paper into the glue, whipping along edge of bowl to remove excess. There should be enough glue on the newspaper for the entire paper to be completely saturated, but not so much that its dripping off all over the place.
5. Place wet paper onto the bone base and smooth out. Repeat until the bone is completely covered with 1-2 layers of paper. Do not apply more than a couple of layers of paper in one session; the paper needs to dry completely and relatively quickly to prevent mold and to ensure a hard finish.
6. Leave in a well-ventilated place to dry overnight. Dispose of unused glue.
7. Repeat steps numbered 2-5 several times, building the shape of a bone with each layer and making sure to allow glue to dry complexly between layers. Make a new batch of glue for each new layer of paper applied (old glue will lead to mold). Finished product should have 6-10 layers and be very hard to the touch, with no give when lightly squeezed.
8. Once the final layer has dried completely, apply 1-2 layers of white acrylic paint, allowing it to dry complexly between coats.
We hope that these fun ideas make your Halloween extra special! Thanks for sharing your day with us!
Other Fun Halloween Craft Ideas: